Do you have a second partition you want to automount a boot? Then this is the place for you. I’ll be using the same VM as in other tutorials.
Software used:
1. Creating a mount point
What is a mount point? A typically empty directory, accessible on the current filesystem where an additional filesystem is mounted.
Just open a terminal (Ctrl + Alt + T) and type:
Remember the name, we will use it later. This creates a directory in your home folder.
2. Identifying the partition
Next, type:
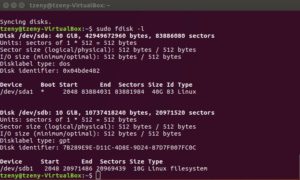
And identify the partition you want to mount.
<a href=”https://tzeny.com/wp-content/uploads/2017/09/partition_7.jpg” data-rel=”lightbox-image-0” data-rl_title=”” data-rl_caption=”” title=””>

/a>
In my case the partition is /dev/sdb1.
3. Writing a fstab entry
What is fstab?
The configuration file /etc/fstab contains the necessary information to automate the process of mounting partitions. In a nutshell, mounting is the process where a raw (physical) partition is prepared for access and assigned a location on the file system tree (or mount point). More info: https://help.ubuntu.com/community/Fstab
First I highly recommend creating a backup:
This creates the backup file fstab.bk in your current directory.
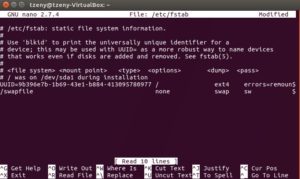
Now, open it up for editing:
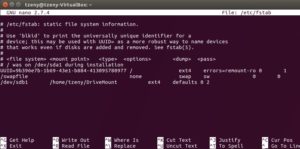
The line I added for my drive:
Tells fstab to:
- Try to mount a partition located at /dev/sdb
- Mount it to /home/tzeny/DriveMount (I created DriveMount in my home directory; if you do the same change this to /home/
/DriveMount) - Partition filesystem type is ext4 (Modify this if you have another filesystem)
- Use default options
- The first 0 is for dump backup utility, leave it to 0
- The 2 means check this partition for defects every reboot (a highly recommended option)
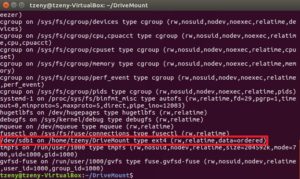
Now reboot, and type:
This should show you all of the mounted devices, including the one you just added.
<a href=”https://tzeny.com/wp-content/uploads/2017/09/partition_3-1.jpg” data-rel=”lightbox-image-1” data-rl_title=”” data-rl_caption=”” title=””>

/a>
And as you can see our drive is mounted.


