After living without AC power, with only handheld LED lamps and my phone light for 2.5 months in Rusty, I decided enough is enough and installed some lights and a 300W inverter.
The inverter is temporary, as in the end I’ll need a much beefier inverter (~2000W continuous should suffice). And I’d like to find a better way of attaching the lights instead of hot glue, as I don’t really like its opaqueness when it hardens.
Future additions: more fuses, battery level indicator.
Parts list:
- 300W (600W peaks) DC to AC inverter – 25 USD
- Warm light copper wire 22m LED strip – 12 USD
- Schuko outlets – 0 USD
- 12V – 5V conversion board – 0 USD
- small electrical switch – 0 USD
- misc electrical components and wires – 0 USD
Overall setup
What I wanted was a module that would take 12V DC power on one side, and provide 220V AC outlets, and 5V DC power output for the ceiling LEDs. Both the outlets and the LEDs should have power switches and obvious on/off indicators.
These being said, here is my current setup:
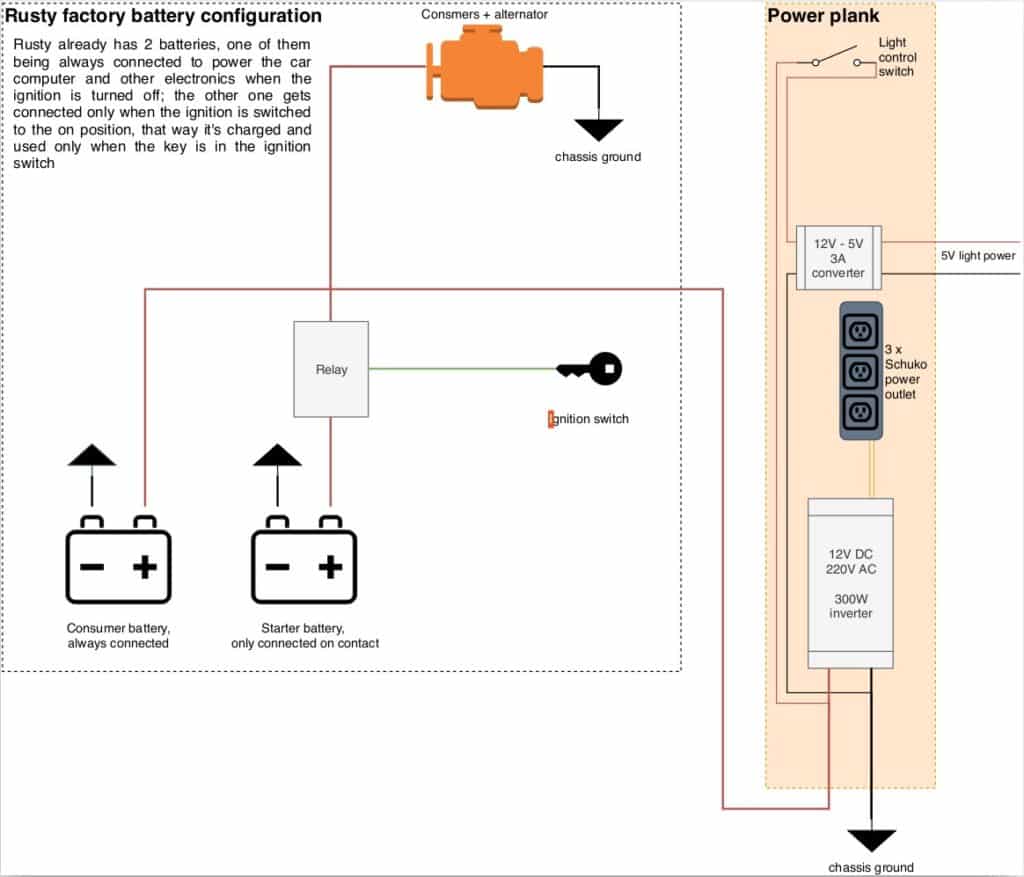
I was lucky that Rusty already has a 2 battery system, which means that I can drain the consumer battery and then easily start the car to recharge it.

I used hot glue to secure the LED strip to Rusty’s roof. This is the result:
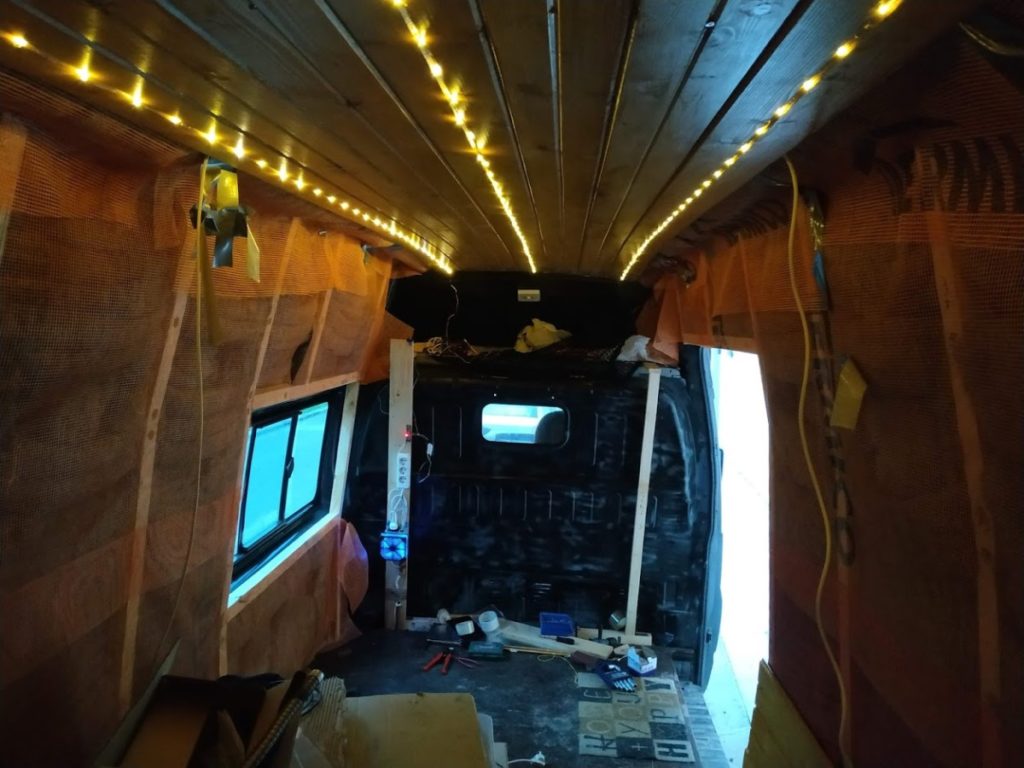
The inverter was really useful, as I could power my 10W hot glue gun, without needing an extension cord and shore power.
Building it
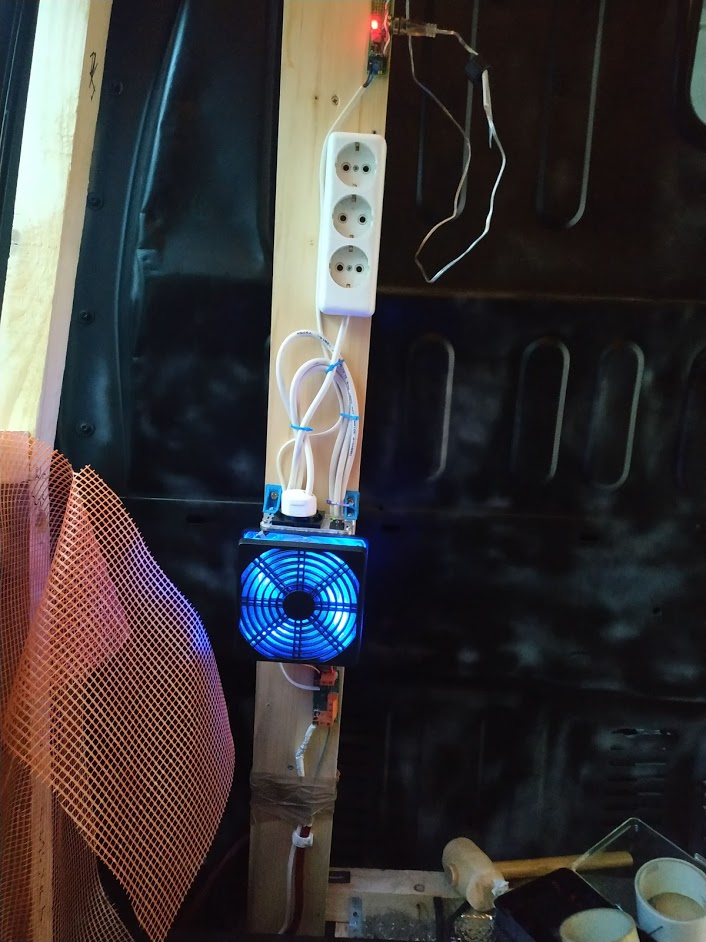
I decided to place all the components on a 1500mm x 200mm(?) x 20mm board. That way it would be easy to screw in components later on.
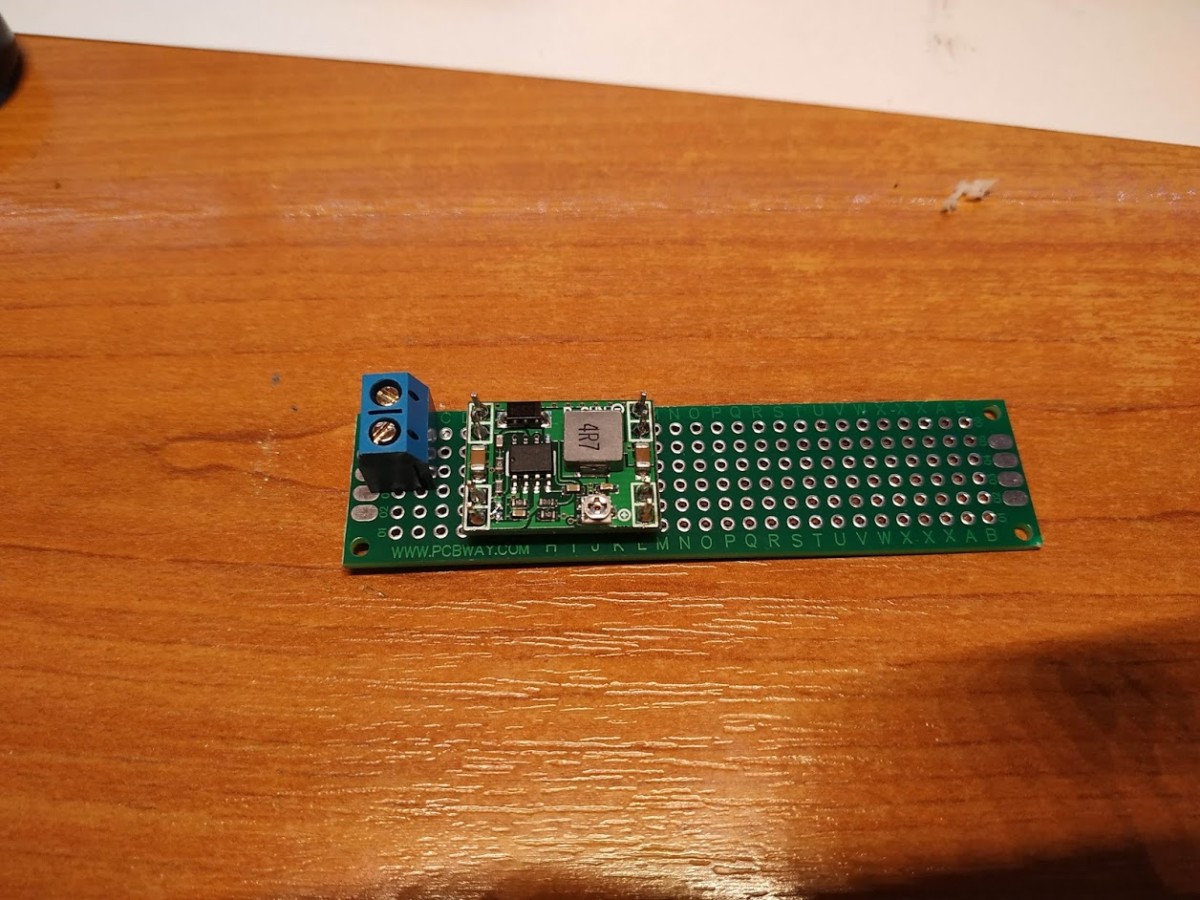
Power delivery board
This is a small PCB designed to take it 12V power via screw terminals and split it to wires leading to the inverter and the 5V converter.
The 3 connectors on the bottom side are there to help me connect additional 12V devices / modules easily (like the Propex heater).
Tip: always color code your negative / positive terminals.
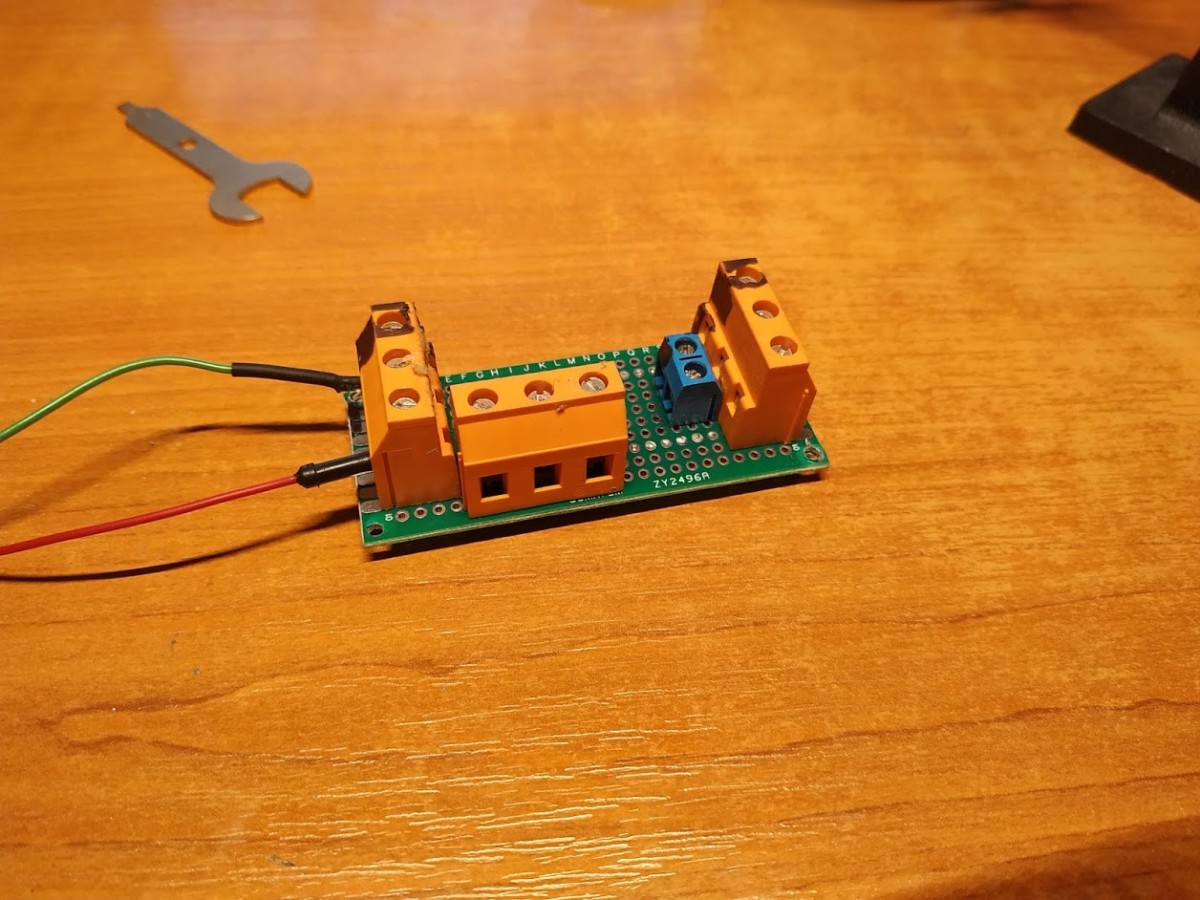

Note: always reinforce high amp rails with solder
12V DC – 220V AC 300W inverter
I modded my inverter by replacing its small, noisy fan with a 120mm PC Fan. Learn how to do it here: https://tzeny.com/2019/12/23/silencing-a-noisy-car-inverter/.
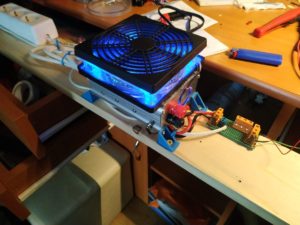
I fixed it on the board using 3D printed L brackets: https://www.thingiverse.com/thing:2226. I cut its supplied wires and fixed them into some screw on terminals on a small PCB used for power delivery.
Fortunately, this inverter comes with an inbuilt power switch on the output side.
Note: this inverter has a build in 40A fuse; you should add one in line if you haven’t already
12V – 5V 3A converter
This converter is based around this kind of conversion board: https://www.openimpulse.com/blog/products-page/product-category/mp1584en-mini-dc-dc-step-module/.
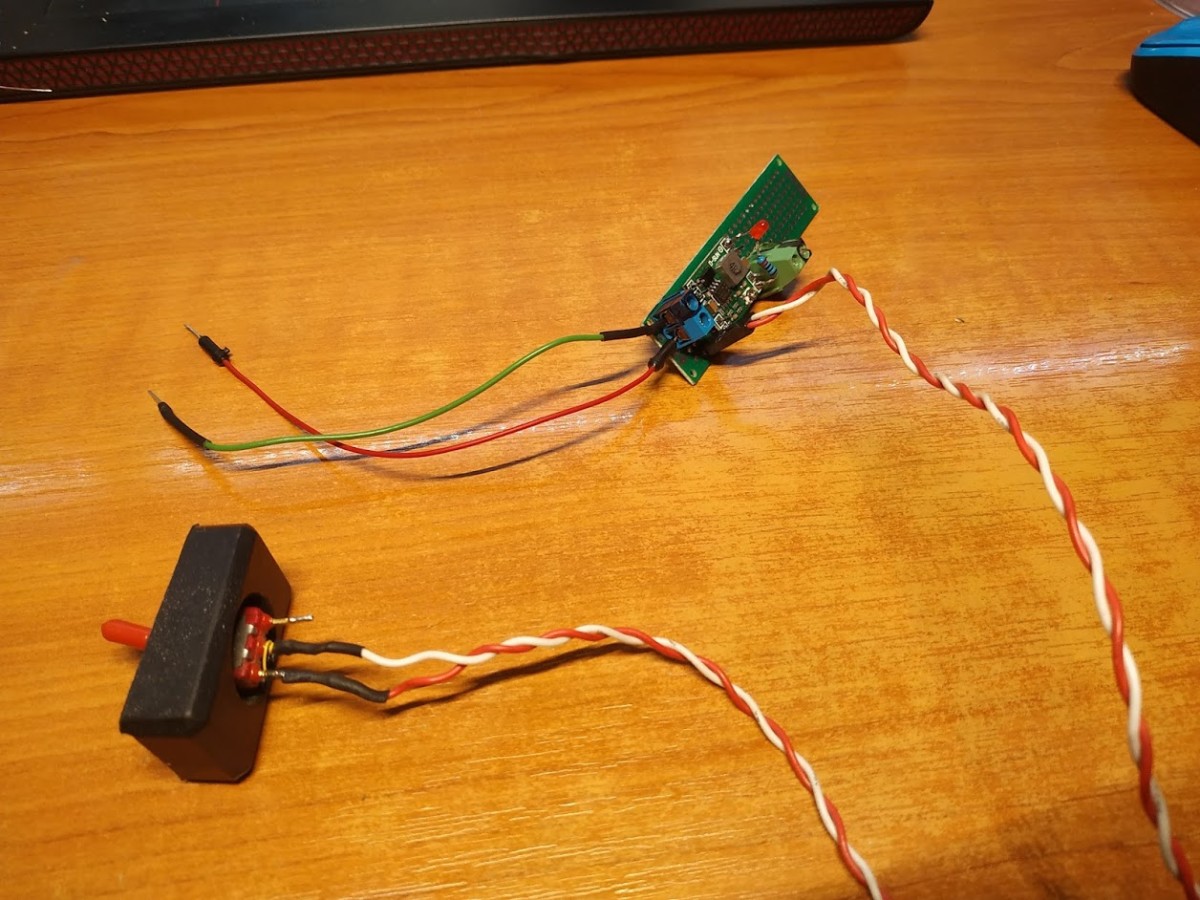
The switch turns off the power delivery to the inputs of the board; it was mounted to the top of the wooden plank for easy access.
Tip: This board should also have a small fuse but I didn’t have one on hand.
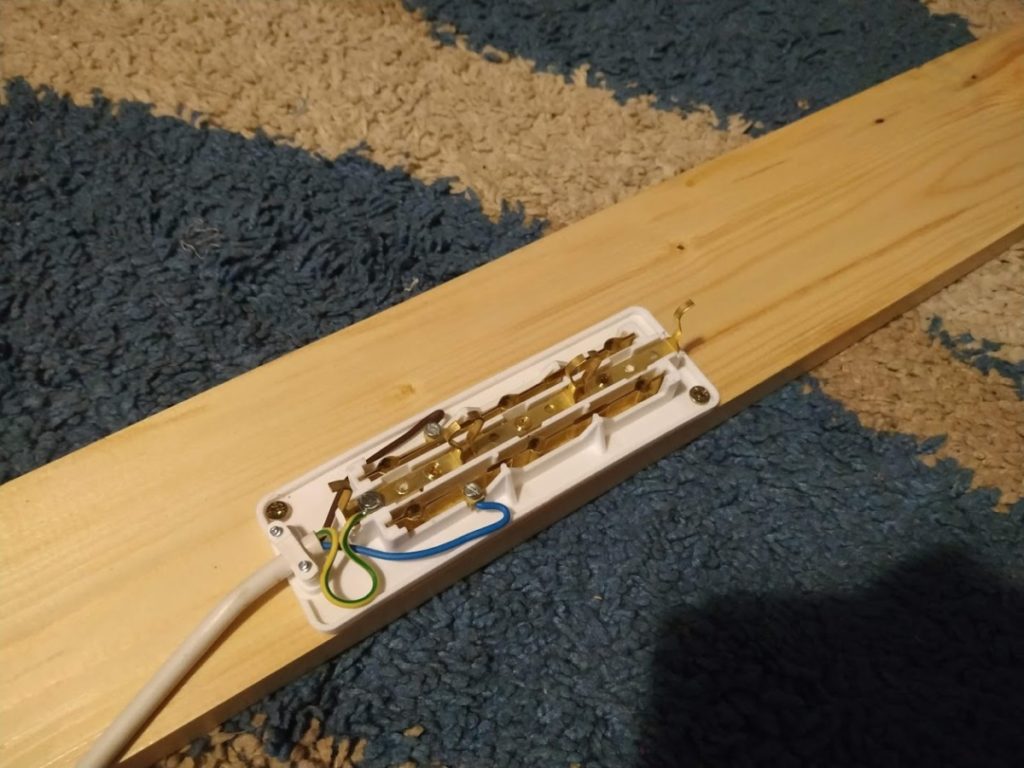
Schuko outlet
This is just a basic 3 output schuko outlet that I took apart in order to screw its bottom half to the board with 2 wood screws; I kept the wire at the original 3M length and coiled it underneath the inverter, securing it with zipties.
Mounting it
I used 2 long wood screws to mount it inside Rusty, where it now powers my ceiling light strips.